How to Recover Data from a Failing Hard Drive
Hard drive failure is increasingly common these days. While manufacturers’ are developing more reliable and optimized hard drives, logical errors and improper drive use for an extended time often cause drive failure that leads to data loss.
Fun Fact: Approximately 140,000+ hard drives fail in the United States every week.
A hard drive may also fail due to events beyond one’s control and following common problems:
- Overheating
- Firmware Updates
Human Errors
- Improper Use
- Corrupt Files
- Mechanical Failure
- Drive Usage
- Bad Sectors
- Power Failure and Surges
- Unsafe Drive Removal
- Force Shutdown
How to Detect a Failing Hard Drive
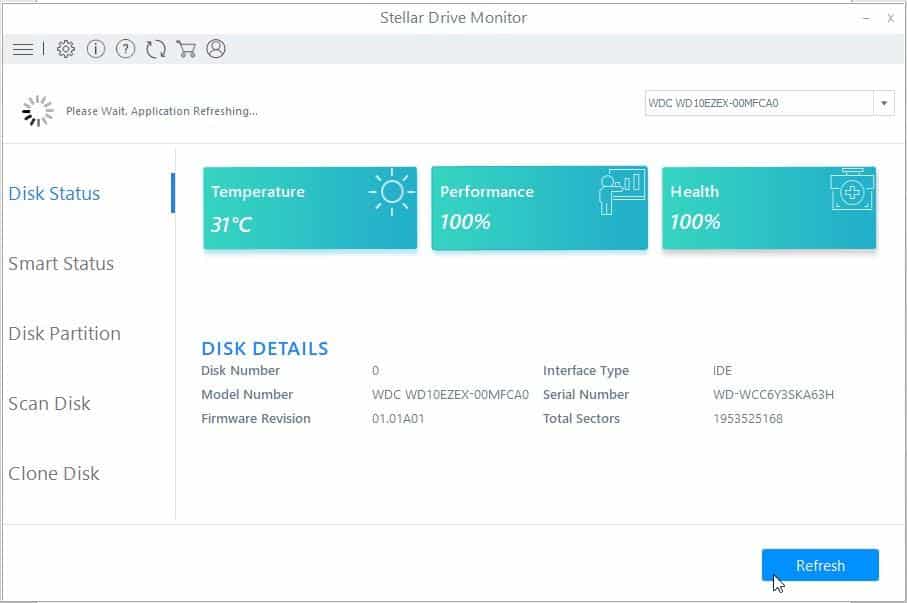
With adequate data protection measures and monitoring the hard drive, one can timely detect a failing hard drive and prevent data loss situations. You can use tools such as ‘Drive Monitor’ that comes embedded with Stellar Data Recovery Professional software.
Figure 2: Monitor Drive with Drive Monitor
The Drive Monitor actively monitors the hard drive for disk errors and logical issues. It displays vital disk health stat, temperature, and performance score that helps you understand disk status and if the drive is failing.
Alternatively, you can manually observe the following signs of a failing hard drive:
- Data stored on the drive turns corrupt
- Drive making screeching or clicking noises
- Drive is overheating
- A large number of reallocated sectors (bad blocks/sectors)
- Drive connecting and disconnecting or turning ON/OFF randomly
- Error on boot
- System crash (Blue Screen of Death—BSOD)
- System slowdown
Steps to Recover Data from a Failing or Crashed Hard Disk
Start with installing the Stellar Data Recovery Professional — a hard drive recovery software. Launch the software and choose ‘Monitor Drive’ to run the Drive Monitor tool.
WARNING: You may run CHKDSK scan in an attempt to fix the hard drive errors—such as file system error and corruption. But be warned, this can cause further damage to the drive, data corruption, and permanent data loss due to drive errors and failure.
For safe data recovery from a failing hard drive, continue to follow the steps given below.
- You can further click ‘Smart Status’ tab to have a deeper look at the drive condition
- Under Smart Status, look for the warning signs. Pay special attention to the ‘Reallocated Sector Ct.’
(Ct=Count)
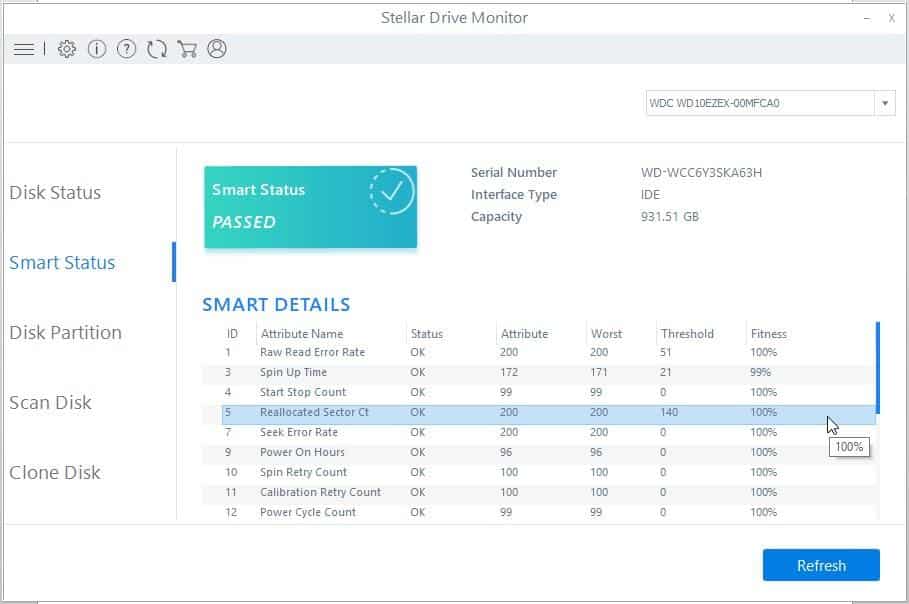
Figure 3: Check SMART Disk Status to detect anomalies
- If the ‘Fitness’ is poor, immediately clone the drive using the ‘Clone Disk’ option. You will need a blank hard disk for cloning with size equal to or greater than the failing drive.
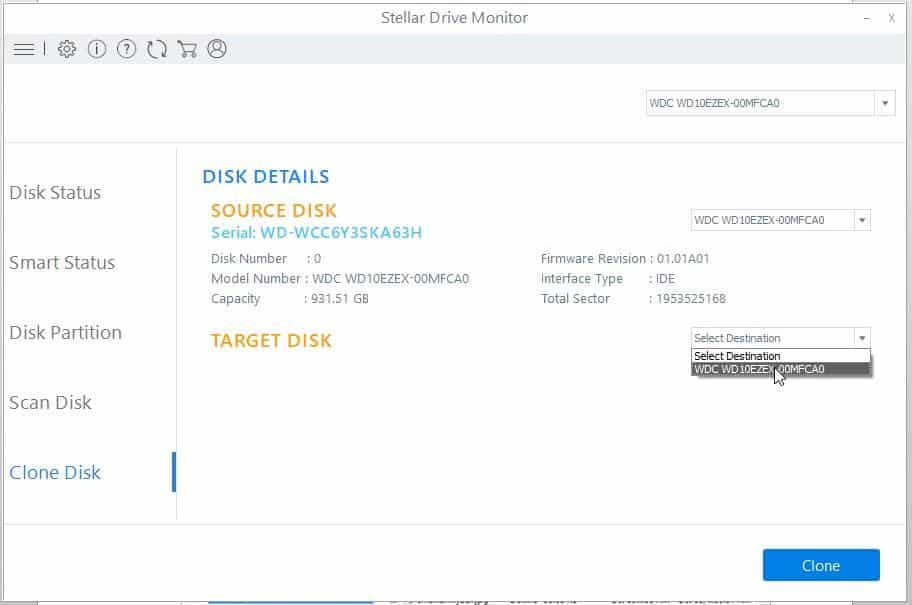
Figure 4: Clone Failing Hard Drive Before It Fails
If you don’t have a new disk, close the Drive Monitor utility and click ‘Recover Data’ to proceed with failing hard drive recovery.
IMPORTANT NOTE: To save the recovered files after the scan, you will require a license key to activate the software. Without a license key, you can only preview the recovered files but can’t save them.
- Select the data you wish to recover or just click ‘All Data’ and click ‘Next.’
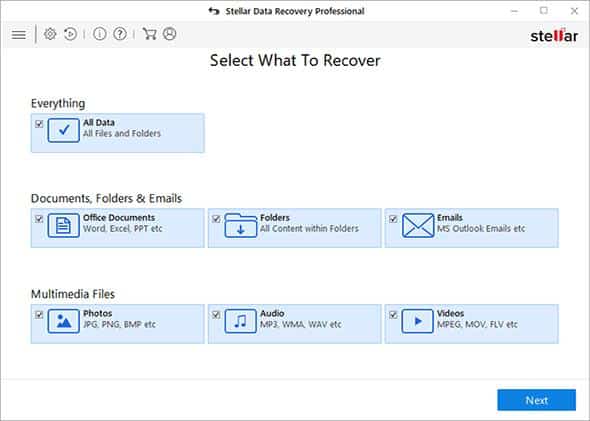
Figure 5: Select Files to recover from failing hard drive
- Select the failing hard drive volume (one at a time) listed under ‘Connected Drives’ and click ‘Scan.’
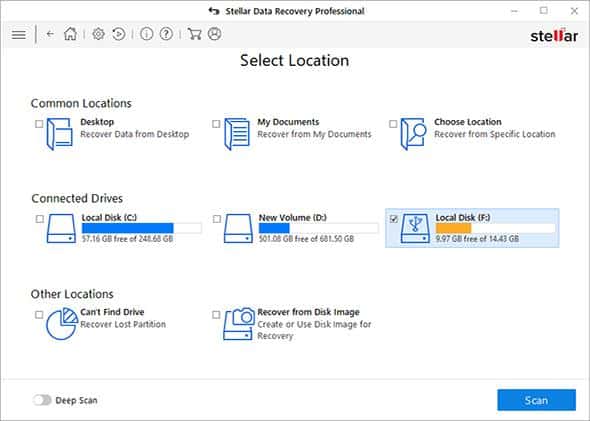
Figure 6: Choose failing or crashed hard drive volume for recovery
NOTE: If the hard drive volume is not listed under ‘Connected Drives’, click ‘Can’t Find Drive’ to find the missing partitions. You may also use the Disk Management tool to check whether your Windows PC recognizes the hard drive.
- After the scan, use the search bar to locate and preview the desired files. If the file is not found, run ‘Deep Scan’ by clicking ‘Click Here’ link at the bottom of the software screen
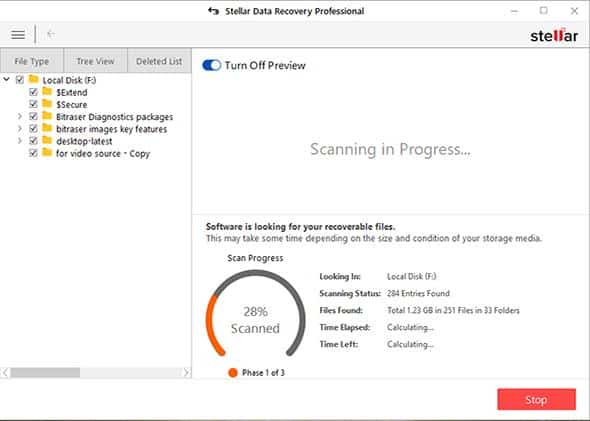
Figure 7: Scan Hard Drive and Restore Data
- Once the scan is finished, select the files you wish to recover and click the ‘Recover’ button
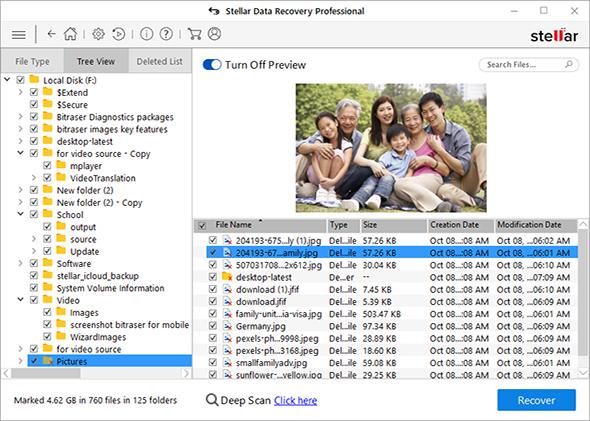
Figure 8: Preview Files before Recovery
- Click ‘Browse’ and choose a save location
IMPORTANT NOTE: Do not select save location on any partition of the failing hard drive. Use a different internal or external hard drive or SSD volume to save the recovered files.
- Click ‘Start Saving’ and wait for the software to finish saving the recovered files at your desired location

Figure 9: Save the recovered files from failing or logically dead hard drive at the desired location
TIP: In case your system is running low on storage space, you can save the recovered files in a compressed folder(s). The feature helps you store a large number of files in comparatively much less space. The option is visible when you click ‘Recover’ button, under ‘Advanced Settings’

Figure 10: Option to save recovered files in a compressed folder(s)
This hard drive recovery software can also help you recover data from a crashed, severely corrupt, formatted, or logically dead hard drive.
Conclusion
The post discusses why a hard drive fails and how to timely detect a failing hard drive by analyzing the signs of failure. Further, we have discussed the steps to recover lost data from a failing hard drive on a Windows PC with the help of Stellar Data Recovery Professional tool.
So follow the steps as mentioned in the post and quickly recover data from a failing hard drive. Also, create a backup after hard drive recovery to prevent future data loss due to such unforeseen reasons.
Further, you can use the Drive Monitor tool that comes embedded into the Stellar Data Recovery Professional software to keep an eye on the vital disk stats. The tool empowers you to detect anomalies and act promptly to prevent data loss.