How to Add, Remove and Change Devices on Sky Go
The age of conventional television viewership is disappearing and a modern world with digital services is emerging. Many channels that were previously dominant in the traditional market have sensed the change and begun moving their content to online platforms. In this article we are taking a look at the online streaming service from Sky. More specifically, we are looking at how add, remove and manage devices on Sky Go. Bear in mind that Sky Go is a UK exclusive service. But, it can be accessed from abroad using a VPN. below in this article, we will cover the How to Add, Remove and Change Devices on Sky Go.
What is Sky Go?
Launched in 2006, Sky Go is a service which allows users to watch television or video content in general both live and on-demand. Obviously, Sky Go features all the content from the channels operated by the parent company and other affiliates. The service is free to use for those who already have a Sky TV subscription at their homes and for those who don’t, they have to pay to purchase programs that they want to view on the platform.
Package prices and limits on devices that can be added
Sky Go seems like an expensive proposition if you’re not a domestic Sky customer because the Internet Service Provider charges on-the-go for the app. So, you pay as you use the app and this can add up to quite a lot if you decide to binge-watch content on the application without a subscription. However, the topic of our discussion is how many devices can be added to a single account and how to manage them.
Sky Go offers two packages. The first is the default plan which allows a user to add only two devices. Yes, that right, just two devices. The gadget can be of any platform but there can only be two of them. You can upgrade to Sky Go Extra and open access for two more devices in your account but this privilege comes at a cost of £5 a month. Also, if you want to add a device after reaching the limit, it can only be done by removing a device first, a process which can also be done only once every month.
Managing devices
The process to add, remove or update any of the settings on a device that you’ve added to your Sky Go account is simple. You only have to sign in on the app specific for that device and the device is added automatically. Removal of a device can be done online at go.sky.com. We’ve already discussed that the maximum number of allowed devices on a normal account are two while on a Sky Go Extra account these are four.
Adding Sky Go
We’ve hinted on the procedure of adding a device in the previous section. All it takes is for you to download and install the Sky Go application on your gadget. Once this is done, open and sign in using your Sky ID. This first account serves as your primary account. And you can then create nine additional accounts from it. However, don’t get excited because the maximum number of added devices only comes from the
Here is a list of a few devices and how to manage Sky Go on these platforms:
Mobile devices
There is no complex procedure in adding a mobile device to your Sky Go account. There are purpose-built applications for both Android and iOS that can be downloaded for free off the respective app stores. Once the service has been initiated, all a user has to do is sign in and they’ll be able to enjoy live programming from their favorite shows and their devices get added to the list automatically.
Personal Computers or Laptops
Playing shows on PC or laptops requires Microsoft Silverlight to be downloaded beforehand. If you don’t already have it you can get it when prompted before the viewership of any video on the application. In order to add a Mac or Windows device, users have to go to go.sky.com. Click on ‘Sign in’ in the top right corner, enter their credentials and finally log in. Once again, the sign in adds the device to your list provided there is a slot free.
PlayStation
Yes, for those of you who frequently play games, it shouldn’t come as a surprise that Sky Go is also available for the console. It does require a Sky Go Extra connection to begin with because without that gaming console users aren’t able to watch anything at all. On the PS4, you simply sign in to the PlayStation Network, go to TV and Video, install TV from Sky and for the older PS3, you sign in and then go to TV/Video services, My channels and then pick Sky.
Xbox
It is a similar case for adding an Xbox to your Sky Go account as with a PlayStation. It requires a Sky Go Extra account on all costs and without that things won’t work. Once you’ve downloaded and installed the application on your Xbox, the following process is quite straightforward and requires signing in using the credentials that you already have.
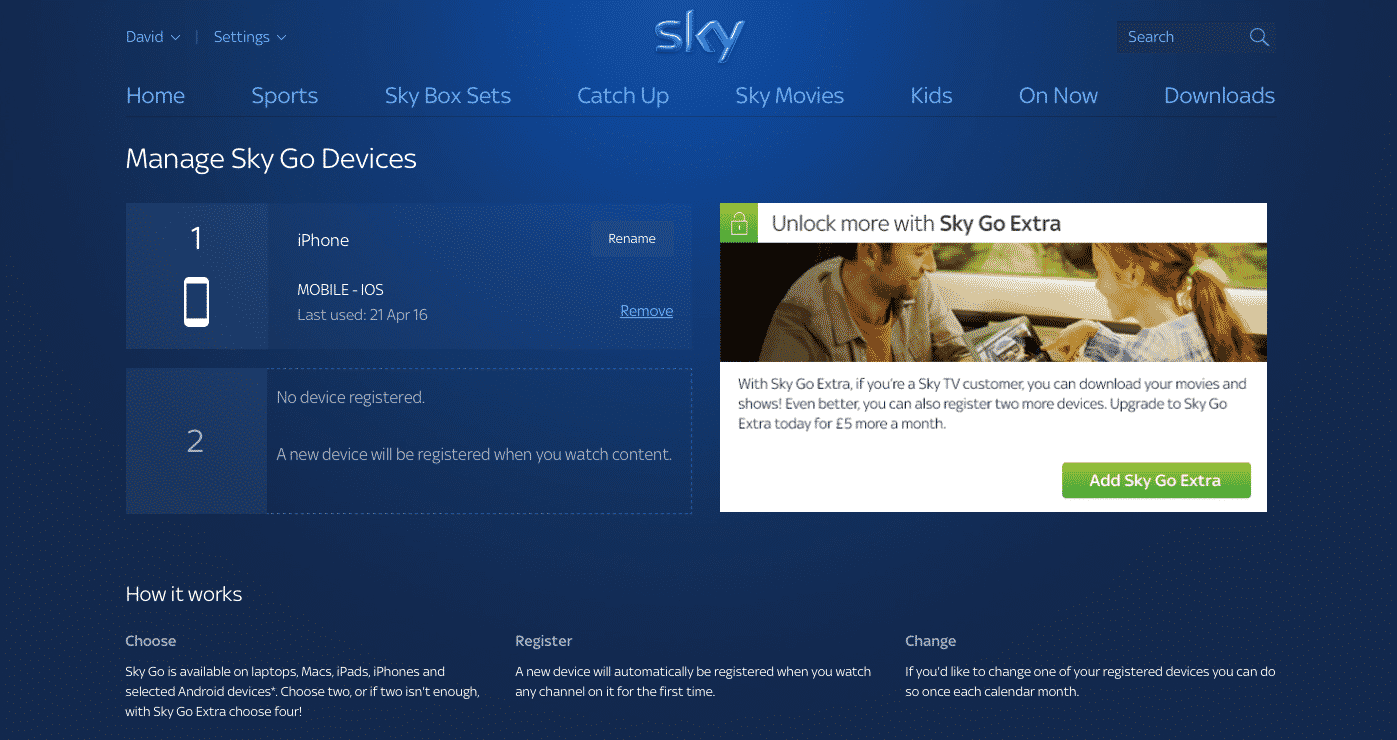
Device management settings
As you near your limit for devices on an account, there is a warning message that you receive regarding the development. Most Sky GO apps on different platforms have a Settings tab from where users can manage their devices with ease. It is easier to do this from the website itself at go.sky.com. Simply sign in, click Settings and then Manage Devices. You can view certain details about a device and rename them to make them more relevant and you can also remove them to make space for others.
Removing devices
The process of removing a device from Sky Go is no hard thing to do either. The same ‘Manage Devices” window that you were accessing previously provides the option to remove a selected device from the list. When you click remove, a prompt will show up asking you to confirm whether you want to perform the action or not. Just select Yes and now that device disappears from the list opening space for a new device on the subscription.
Conclusion
Sky Go can be an exciting application for those who already have a Sky package because without that it takes up quite a lot data trying to play content. However, if you have Sky go, now you know the basics of adding, removing and managing your added devices.