Every time whenever we need any update in Windows 10 operating system it used Windows Update. This process does the updates in the background. Whenever we require any software we need to uninstall or we need to add or remove any feature of windows then at that time we require Windows Modules Installer Worker to do that task.
What is Windows Modules Installer Worker?
Windows Modules Installer Worker is a system process. By using this process it enables installation, modification, and removal of Updates of Windows and its elements. We know that inside the computer it has a fan that will run whenever we switch on the computer and it gets hot after some time. We will see the Task Manager and you find “Windows Modules Installer Worker” that will use most of the CPU and disk space. Windows Modules Installer Worker process also known as “TiWorker.exe“. This process also includes the Windows operating system.
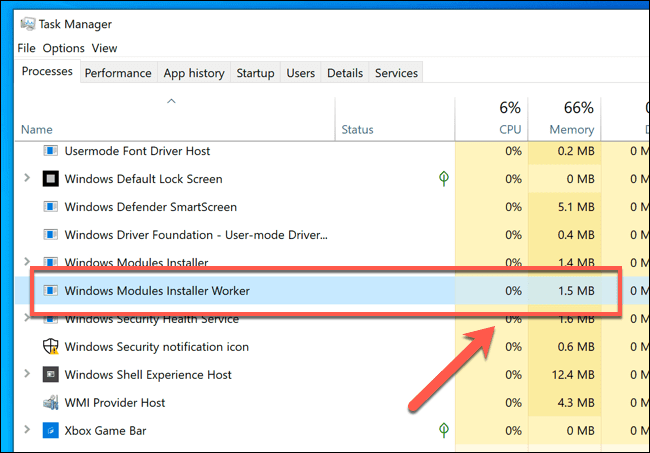
If you open the task manager then you will find the Window Modules Installer Worker in the Process tab this is the name of the process and the name of this file is TiWorker.exe we will see this in Details Tab.
The Microsoft company has given new updates of software on “Patch Tuesday“. This is every month’s second Tuesday. But they also give updates on other days. But most of the time give updates on the second Tuesday. Whenever our system has several processes if any process that uses the most of the CPU. At that time we can download the latest update of that process from the company.
Whenever we need to update any software we don’t need to restart the system, because our operating system is doing so many updating tasks in the background. That’s why we don’t need to restart the computer we do our work continuously.
Why Windows Modules Installer Worker using a lot of CPU?
 This process uses the CPU whenever there is a need to update any software. We need to permit this process to use the CPU and disk space. Whenever an update completes its work then it will release the CPU and disk space. How much time this process uses CPU and disk space is based on our computer speeds of CPU and Disk.
Solve Windows 10 having Windows Modules Installer Worker use much CPU
There are 5 ways to fix this problem. Below are the 5 ways.
- Refresh Windows Update By Removing SoftwareDistribution Folder
- Restart Windows Update Service
- Windows Update Troubleshooter
- System File Checker Tool To Scan And Fix Corrupted System Files
- DISM Tool To Find And Fix Windows Corruptions
1. Refresh Windows Update By Removing SoftwareDistribution Folder.
If any updates of the software come, then our system needs to download those updates and put that into the folder. That folder we called Software Distribution. Now we need to use the downloaded files install in the system. The path of the folder is
Whenever we try to install the updates available in the downloaded folder. If any one of the files in that folder is not working properly, then it will be stuck sometimes. For that reason, that process needs to use the CPU and Disk space. To solve this problem we need to delete the folder “SoftwareDistribution” on our computer. After that, we can update. By doing this it will remove all files from the system and again it will download the files one more time into the system.,
Hold the Windows and +R and type services. MSC in the run, now find the “Windows Update” and we need to stop this process. If you do not stop this process we are unable to remove the SoftwareDistribution. Now we type C:\Windows\ then find for SoftwareDistribution folder and remove that folder. Now restart your computer and now we see those updates.
2. Restart Windows Update Service
The easy method to solve this problem by restart the service Windows Update. We need to type Windows + R that will open the run now we type services.MSC.Now we see Windows Update, right-click on this process, and press on Restart.
3. Use Windows Update Troubleshooter
Whenever we use Windows Update Troubleshooter to solve this problem it will check and solve the problem that will relevant to the Windows Update. The expert of Microsoft is suggested using this to solve the problem.
The path to use the Windows Update Troubleshooter is:
Control Panel—>Troubleshooting—>View all—>Windows update
When we see the Windows Update Troubleshooter is coming then we press on Next and you need to follow the steps to find and solve the problem
4. System file checker tool to scan and solve corrupted system files
In any situation, single or more system files that are relevant to Windows Update are damage. At that time our system has faced some problems that are more resource usage. To solve this problem use the System File Checker tool.
This tool is used to scan and repair those damaged files. To use the system file checker click windows +x that will open the context menu and now we need to choose the Command Prompt. Now type the following.
5. DISM to find and solve windows corruptions
This tool is used by the users of Windows to scan the entire operating system for the damaged files and solve the problem. To open the DISM tool click on Win + x and choose the “Command prompt”.Type
- exe /Online /Cleanup-Image /Restorehealth

